Showing posts with label Parties. Show all posts

Thursday, June 12, 2014

Shaped cookies

There is a secret to making perfectly shaped cookies and its all about freezing the dough!  The recipe needs to be firm enough not to spread all over the place so the cookie holds it's shape.  This is a good recipe that makes about 24 medium hearts and stars, and 12 small hearts and bears!


Ingredients
3 cups Plain Flour
1 tsp salt
1 cup butter (225g) softened
1 cup sugar
1 cold egg
1 tbspn vanilla

Method
Preheat the oven to 165 degrees.

Mix the butter and sugar together for 5 minutes until pale and fluffy.

Add the egg.

Add the sifted flour, then vanilla.

Roll with 2 dowels to make each biscuit an even thickness.

Freeze the rolled out dough before cutting into shapes.

Bake for 12-14 minutes or until edges have browned slightly.


The best icing is royal icing as it sets hard.  You need to add the sprinkles before it dries!

Monday, May 6, 2013

The Kit Kat Kake!


The Kit Kat Cake


So if you are after a quick, sugar-filled cake this is the one for you!  It is simply made from 2 round cakes, with a little jam in between to keep them together.  Then cover with a butter cream icing, surround with kit kats and cover with m&m's or smarties.

As a word of warning there is a drastic amount of kit kats involved in the making of this cake!  I think we used about 3 or 4 family sized blocks!

Monday, September 10, 2012

Rainbow cake

Source: Martha Stewart

We recently made a rainbow cake for one of our dear friends, and I must say it turned out fab!  It was pretty simple to make also, albeit a little fiddly cooking 4 separate layers of cake, yet very effective.  Here were some tips that we picked up...

1)  Firstly we just used 1 batch of cake batter, and divided into 4 portions using the kitchen scales to help make them equal.  Four portions was good for the size cake we made, but certainly could have made more.

2)  We cooked each portion separately in a casserole dish (as we didn't have a small enough cake tin!).  It was a good size and you don't want the cake to be too squat.  You need to wash and dry the cake tin between uses.  The first cake I cooked for about 14 mins, and then removed a minute for each subsequent cake on the basis that the tin and oven were hot!

3)  The cakes were stored overnight in an airtight container.  I should have put baking paper between the level though as they sweated a bit and stuck together slightly.

4)  The next day we made the meringue icing.  It was very effective having pure white icing and it was so soft and fluffy, like meringue!  You make a sugar syrup with 1 cup of caster sugar and 1/3 cup of water.  After it has boiled for about 3-5 mins, it needs to be tested.  You do this by putting a small amount on a teaspoon into a glass of water; it is done when the syrup is like a tacky toffee.  Take it off the boil, let the bubbles subside before pouring slowly into 2 beaten egg whites.


5)  We used 1 tablespoon of icing for each layer of cake but could easily have used 2 tablespoons.  The icing generously covered the cake.  And ta da...

Admittedly it didn't QUITE look like Martha Stewart's when cut, but then we had 4 hungry and excited little girls demanding some cake so the cutting was done under pressure!


Monday, July 30, 2012

Novelty party food ideas

Every now and then I see some clever little food idea that I think I must make some time.  Clever being that it is a simple idea that has an overall very cute effect!  Here are some of the things I am keen to try.

1) Teacup cookies


I have had these earmarked for ages but haven't actually tried them yet.  You need:

1 packet Tic Toc Biscuits
250 grams Marshmallows
1 packet Freckles
2 packets of Musk Lifesavers
1 cup melted white chocolate (works better than icing apparently)


To assemble, stick the marshmallow onto the biscuit, icing side up.  Then stick a freckle on the top.  Half a Lifesaver stuck to the side forms the handle... easy (though sounds fiddly).

2)  Milky Way cars


How cute are these!  To make them you need:

1 packet Milky Way bars
1 packet Honey flavoured Tiny Teddies

1 packet Smarties1 cup melted chocolate (works better than icing apparently)

To assemble, stick the colour coded Smarties on the side of the bar.  Then push the Teddy and the Smartie into the bar.  Voila!

3) Wafer Teacups


These teacups are made from wafers and biscuits.  Here's how they are made:

Cup-style wafer icecream cones
Round cookies
Icing
2 gummy rings
Assorted lollies to fill the teacup

Use a serrated knife to carefully cut the cup portion of the cone.  Use the icing to stick the gummy ring on the centre of the cookie, and then to stick the cone onto the gummy ring.  The second gummy ring is used to make the handle of the teacup.


4) Chocolate Party Spoons


Don't these look amazing!!  I think the key to these is the cute pastel coloured spoons and the cute little lollies!  I found this idea on Delicious Delicious Delicious blog which has step by step instructions.  Essentially you elevate the spoons so they are level, the pour melted chocolate (use a good eating chocolate for them!) and then sprinkle with the lollies of your choice.  Ta da!  I like the sparkly sprinlles too.  One tip if you are using chocolate lollies wait for the chocolate to cool a little otherwise they will melt.


Monday, July 23, 2012

Party for a 2 year old!

Two year old parties can be a tad tricky as most toddlers have started to become aware of the business of birthdays... especially if they have older siblings.  They know birthdays consist of cakes with candles, presents to be ripped open, and most importantly lolly bags, yet are too little to get to caught up in games or to have a say about the invite list (that comes next year!).  If older kids are attending it becomes necessary to provide some kind of entertainment at the party though.  Here was the program we provided at our recent 2 year old party:-

1)  Games
We played 3 games (mainly for the older kids):  pass the parcel, a treasure hunt and pin the tail on the donkey (courtesy of Granny).  It was all good fun and frankly enough I thought, particularly since you need prizes for each person these days!  We wrapped lollipops into the pass the parcel, and hid pens that light up in the garden, along with gold coins.  The pens were wrapped with everyones name on the parcel so everyone had to hunt for the parcels and then give to the appropriate person.  Pin the tail on the donkey was loved by the older kids as they hadn't played that game before and loved it.  The 2 year olds weren't into it AT ALL, especially hating the blind fold!


2)  Food
We served a bbq for the adults for lunch so the kids had sausages in rolls, corn on the cob and chicken kebabs (which they didn't really eat).  They also had fairy bread and fruit shapes followed by butterfly shaped cookies on sticks.  I had popcorn at the ready but felt like they had had enough to eat by then.


3)  Cake
The cake was a butterfly cake which was made from a simple round tin.  Once cooled I cut it in half, put the half circles back to back and cut small triangles from the sides.  The rest was in the icing and decorating.


Monday, January 9, 2012

Fairy Party No 2!


Our 4 year old was very excited about having yet another fairy party for her birthday! We tried to do a few things differently than last time, in case last year's attendees started to see some monotony occurring!

This time we decided to call on a Fairy to come and help with the entertainment since we had nearly 20 kids coming. 
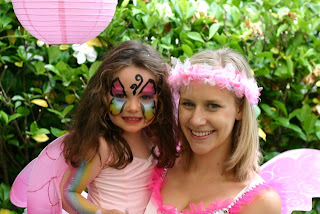
Fairy Jasmine was wonderful and I would highly recommend. She was very professional, and had a large majority of the kids under control from the moment she arrived. There are always some who just aren't into it! She came for 1.5 hours and arrived 15 mins after start time which worked well as not everyone arrived on time. After about 50 minutes she did the face painting which gave the kids a chance to have something to eat.


THE MENU

So my experience is that the parents don't eat that much at these parties, and neither do the kids really as they are too busy playing. It is after all only morning tea time so they are keen for a few fun treats! For 20 kids and 20 adults here is what we served:

1) Fairy bread - of course! Just cut into triangles this year and probably 2 platefuls only. This needs to be made on the day, but is quick to make.

2) Fairy cakes - I made about 2 dozen of these, a couple of days before and then we iced the day before. The little marshmallow flowers didn't really survive that well though. Both adults and kids enjoyed the cakes!

3) "4" cookies - we made these a couple of days before also and iced the day before. They survived for days afterward though so could have been done earlier if needed to be. We had stacks of these on hand - they were a big hit and adults enjoyed them also!


4) Popcorn - 2 bags of microwave popcorn. This was an easy filler, and so quick to prepare (2 mins in the microwave!) The kids seemed to like so much I ended up using both bags. I saw some cheap old fashioned popcorn cardboard containers at a 2 dollar shop which could be a great serving idea for a smaller party.

5) Chocolate dipped strawberries - we prepared these the day before but they were a bit watery, still fine to serve though. We just melted a dairy milk block and dipped the strawbs before whipping them into the fridge to set. We made around 20 which seemed to be enough.

6) Fruit wands - I put grapes, pineapple and a watermelon star on the top of a popstick which worked well. I need to find a nicer way to present these standing up somehow. Although it was fruit the kidlies loved them because of the novelty! We made about 20 and that was enough.

7) Hot dogs - these were an epic fail! The plan was to cut butterfly shapes from puff pastry then put red dogs in the middle, bake for 15 mins at 220 degrees and dot the wings with tomato sauce before serving. First problem was that I had filo pastry in the freezer not puff... filo does not work! So I just ended up wrapping the dogs in a few layers of filo, used egg wash and then baked for about 25 mins. They were okay tasting but looked very sad... next time supermarket sausage rolls I think!

8) French pastries - we ordered 20 mini chocolate croissants and 10 plain croissants from our favourite french pattissier, which was mainly for the adults. The chocolate croissants were a hit, plain now so. Twenty would have been enough really, although some of the kids were into them too.


THE CAKE

This year the order was for a Fairy Castle which wasn't actually as tricky as it looked, although I do need to work on ensuring straight lines... the top peak looks a bit like the leaning tower! I found the instructions on Betty Crocker's site and swapped marshmallows for sugar cubes around the sides. It was very important to have the fairies around it as well!!

I made 4 butter cakes, and about 3 batches of icing. The most time consuming part was icing the cake as you need to do the crumb coat first to make sure the top coat is clean. It can be really frustrating, as I found bits of the cake kept coming off; the whole cakes were okay, it is the pieces that you cut that are messy. Anyway it was a pretty good result overall, 4 year olds don't typically notice the flaws!


Wednesday, August 31, 2011

Dessert Tables

Has anyone else noticed that the new thing for parties and weddings seems to be elaborately decorated dessert tables? The craze seems to have developed out of the States. They certainly look beautiful!

There seem to be a few very important components to these tables... firstly they consist of all things sweet and must be impeccably styled with lots of glass lolly jars!

Next little glass bottles for milk or soda drinks with stripy straws! After a quick scan The Little Big Company appear to have the cheapest bottles on offer at $1.95 each. Straws are around $0.50 each, in packs of 10 or 20.

Thirdly, labels, labels, labels, labels!! Very important for these to be printed and personalised! Style Me Gorgeous offer a graphic design service, and design your tags, banners, labels, invites, etc and then return you a file to print at your local printer. They charge $20 for invites and $90 for a complete party decor pack.


And its a must to include the very trendy "cookie pops". These are all the go for US dessert tables! They consist of mashed up cake with icing that are formed into balls, covered in icing and decorated. If you wanted to know how to make them and find decorating inspiration you can see more at www.bakerella.com.


And personalised wrapped chocolates for which you may need the The Little Big Company graphic design services!


I don't know what they cost to have a professional stylist come and prepare for you... I intend to find out and will come back to you! All the photos on this post come from Sweet Style, who sell some of the products as well as providing the dessert table service.

Other sites that offer similar products are:

The little big company (www.tlbc.com.au)
Sharnel Dollar Designs (www.sharneldollardesigns.com.au)
Occasion by Design (occasionbydesign.com.au)

If you are looking for more dessert table inspiration try some of these sites:

Amy Atlas Events (www.amyatlas.com)
Christina Re (cristinare.com)

Thursday, August 11, 2011

Birthday cake kits


I love a kids party, they are so much fun! Of course one of the most important elements is the cake!! I quite enjoy making birthday cakes but it can be a daunting task, especially coming up with new ideas every year!!

I found this web store that sells cake kits for around $25 - they send you everything except the cake (which you could just buy) and the icing mixture (they send you a recipe). The kits include the sugar decorations, wire decorations, icing colouring, silver/gold pearls and candles... not too badly priced.


So you make or buy the cake, make up the icing, and then use the kit to decorate...


Below are a couple more of the designs, but check out the others at Razzle Dazzle Cake Kits.


Saturday, February 19, 2011

Martha Stewart's Pom poms

Martha's Pom-poms are a very easy and festive decoration to make, extremely cheap (about $1.50 each!) & BIG on impact! I first saw these a very stylishly clever friend's house, and have since seen them all over the place.


Using coloured tissue paper fold about 10 layers accordion style. Martha suggests stacking 8 20 x 30 inches tissue layers, and folding 1 1/2 inch folds. Crease each fold.


Fold a piece of floral wire over the centre & twist. Then trim the ends into rounded or pointy shapes. I used a long piece of string so they could be hung up later, but a piece of fishing line would be ideal to give the appearance of floating


Fan out the layers, one at a time, pulling REALLY carefully as the tissue paper rips so easily!


Martha says tie something to the floral wire & hang!


Easy peasy lemon squeezy! (Mine didn't quite look like Martha's, or Jane's for that matter, but were still effective!)


The pictures are taken from Martha Stewart's site. See more at www.marthastewartweddings.com

Friday, February 11, 2011

Fairy Parties

If you have a little girl it is inevitable that you will be hosting a fairy party at some point in your little ones lifetime! There are lots of ideas on the net - here are a few that I used:

1) THE RUN SHEET

Since our little one was turning 3 we decided on a 2 hour duration so having a run sheet seemed important to make good use of the time.

From what I researched the general guidelines were incorporated into the schedule:


10am Drink on arrival for guests & parents

10.20 Let the games begin! (half hour is more than enough for this age group)

11.00 Serve the food (after activities)

11.30 Do the cake (half an hour before the end)

12.00 Last half hour was free play


2) THE CAKE

Very important!! I made the cute little fairy cottage from the Women's Weekly cake book. It was very easy - I used 2 mixing bowls to cook the cakes and put the roof on a piece of heavy cardboard. Admittedly we didn't leave it constructed for too long as it was an exceptionally hot day!


3) THE FOOD

Fairy cakes! These were made the day before.

Fairy bread! I copied this idea from cupcakesandallthingssweet.blogspot.com. Very easy & effective!


Fairy fruit wands - made by skewering fruit pieces and placing a watermelon star on the top.

Lots of pink marshmallows

Sausage rolls - I made these from a Donna Hay recipe which are usually fantastic. However I made them a few days before in order to free time on the day. In hindsight the sausage meat could have been made the day before but they can really only be rolled in the puff pastry on the morning so the meat juices don't make the pastry soggy!

Pink "fairy juice" - We put Waterfords Apple Berry mineral water into jugs - probably not the best for kids due to the artificial sweetners but it IS bright pink!


4) THE GAMES

We played 4 games. A few of the littlies under 3 were over it by the third game, but was probably about right for the 3 year olds+!


Firstly, Whats the time Mr Wolf as a bit of a warm up - no prizes awarded!

Then, Pass the parcel with little rings in each wrapper for the girls, and stretchy reptiles for the boys!

Next, Musical Statues. Everyone won a bouncy ball for their best pose!

Finally, a Treasure Hunt to find fairies and bulldozers hidden in the garden. We made up a story as to how they all got there then everyone brought the findings back. They were able to take one home!


5) THE TAKE HOME BAGS

We are big fans of the lolly bags in our house! We tried not to use toooooo many lollies this year and include some other fun things like little pens, stamps, stickers, and bouncy balls.


6) THE DECORATIONS


I made some of Martha Stewart's Pom poms (see post) which worked really well in different shades of pink. We hung them from the trees and from the sun shelter which we pitched as the Fairy Tent. The tent was surrounded by white tulle curtains... wasn't particularly effective as I had underestimated how big the shelter was so didnt really have enough tulle to drape... next time!

Some other ideas I have since had are pastel coloured balloons on the trampoline for bouncing fun, and buying fairy nets from $2 shops for draping around the backyard!

And of course everyone had to dress in a fairy dress if they had one!